
USB Install
![]() Installation of ExTiX to a USB Flash Drive
Installation of ExTiX to a USB Flash Drive
(To perform the installations you must be root)
NEWS 240607
The ExTiX ISO is now a ISO-hybrid, which means that it can very easily be transferred (copied) to a USB pen drive.
A) “Normal” installation without persistence
ExTiX can be installed/transferred to a USB stick directly from the ISO file. It might be good to use this method if your computer lacks a CD/DVD drive, or if you just prefer to run Linux systems from a USB stick.This is the way to perform the installation:
1. Boot up a Linux system (Ubuntu or…) and download the ISO file extix-deepin-24.6-refractasnapshot-3910mb-240607.iso
2. Open up a terminal and cd to the folder where the ISO file is
3. Insert a USB stick and make sure which name it was given (/dev/sdb1 or /dev/sdc1 or …). Check it carefully to avoid data losses!
4. Run the installation command cp extix-deepin-24.6-refractasnapshot-3910mb-240607.iso /dev/sdb
5. Then run the command sync
Done!
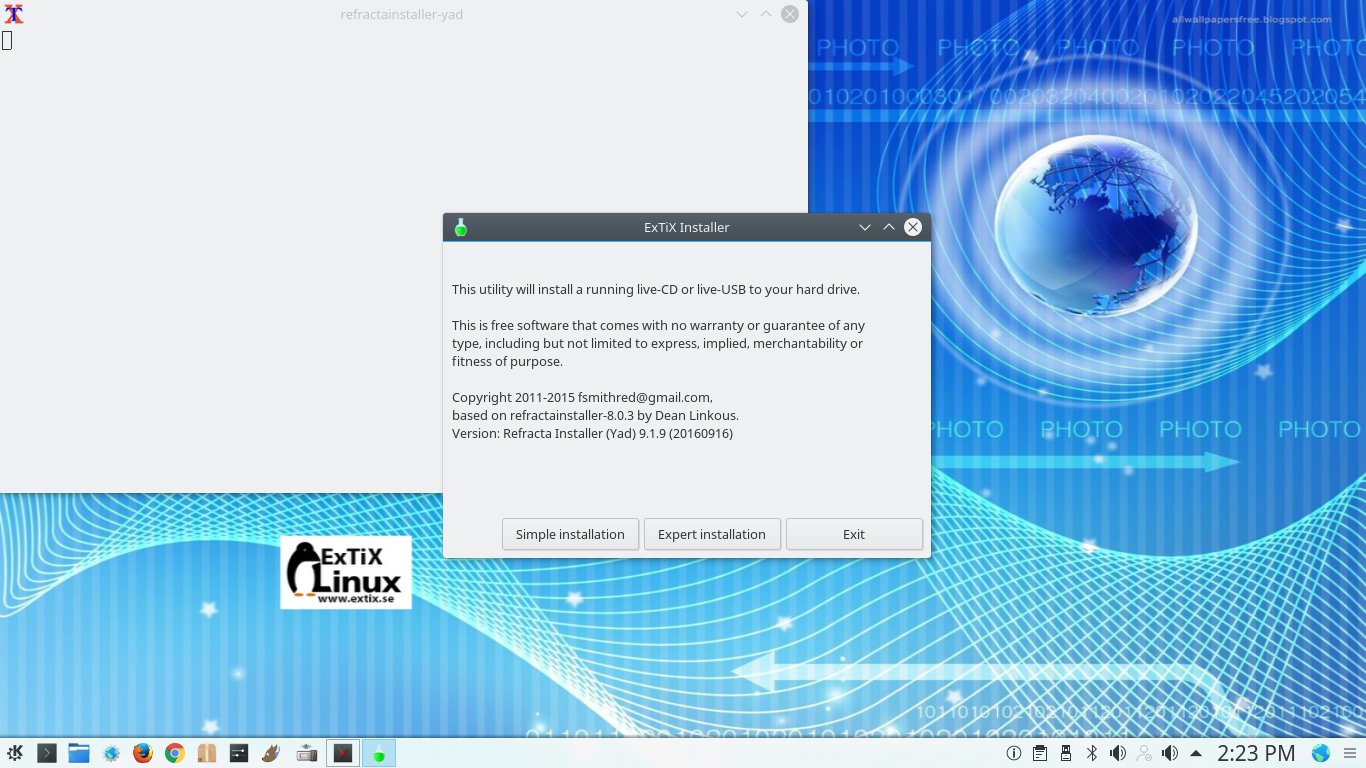
B) Installation with perfect persistence using the regular installation program Refracta Installer.
Do it like this: Start up ExTiX a DVD and insert a USB stick. No need to format the stick in advance. Just do as the following screenshots show.
1. Screenshot 1 – Run the command sudo apt-get update followed by sudo apt install grub-pc
2. Screenshot 2 – Start Refracta Installer
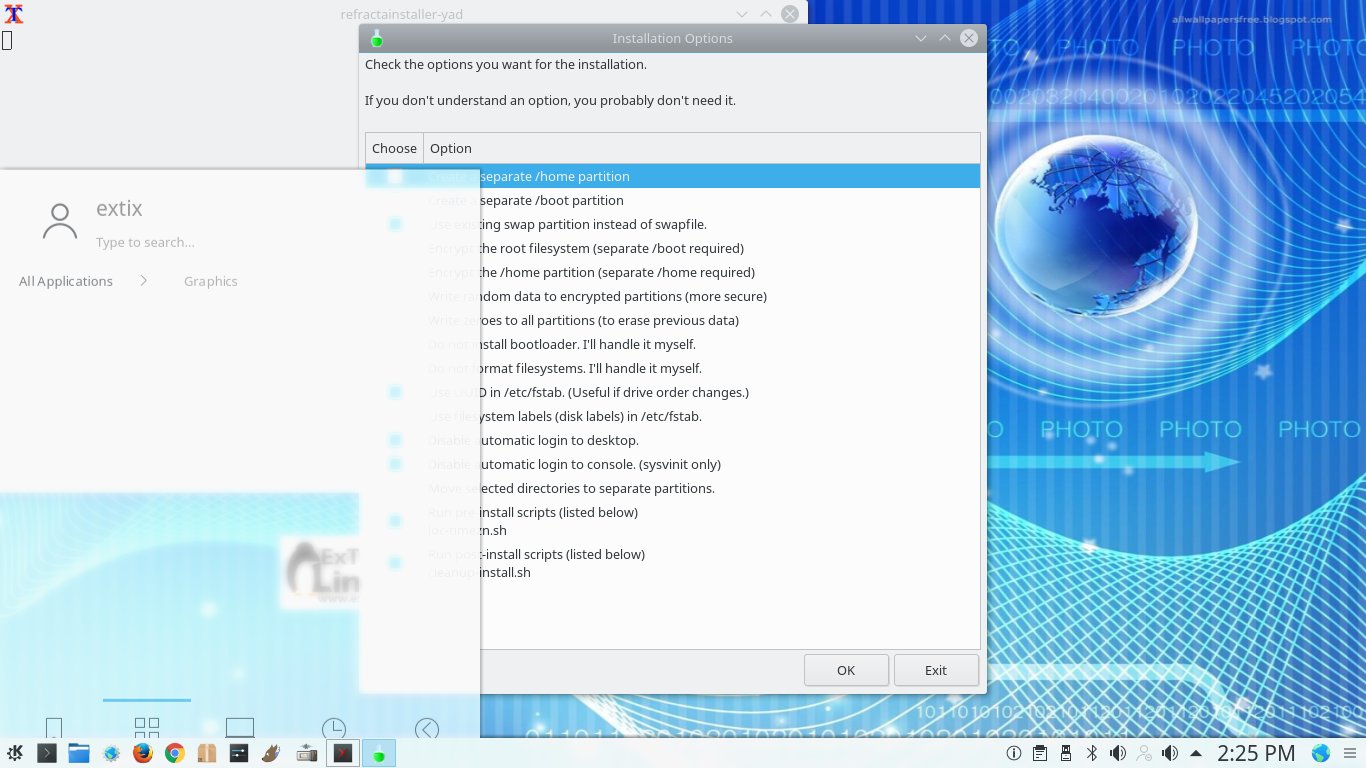
3. Screenshot 3 – Accept the installer suggestions
4. Screenshot 4 – Choose to install Grub in MBR
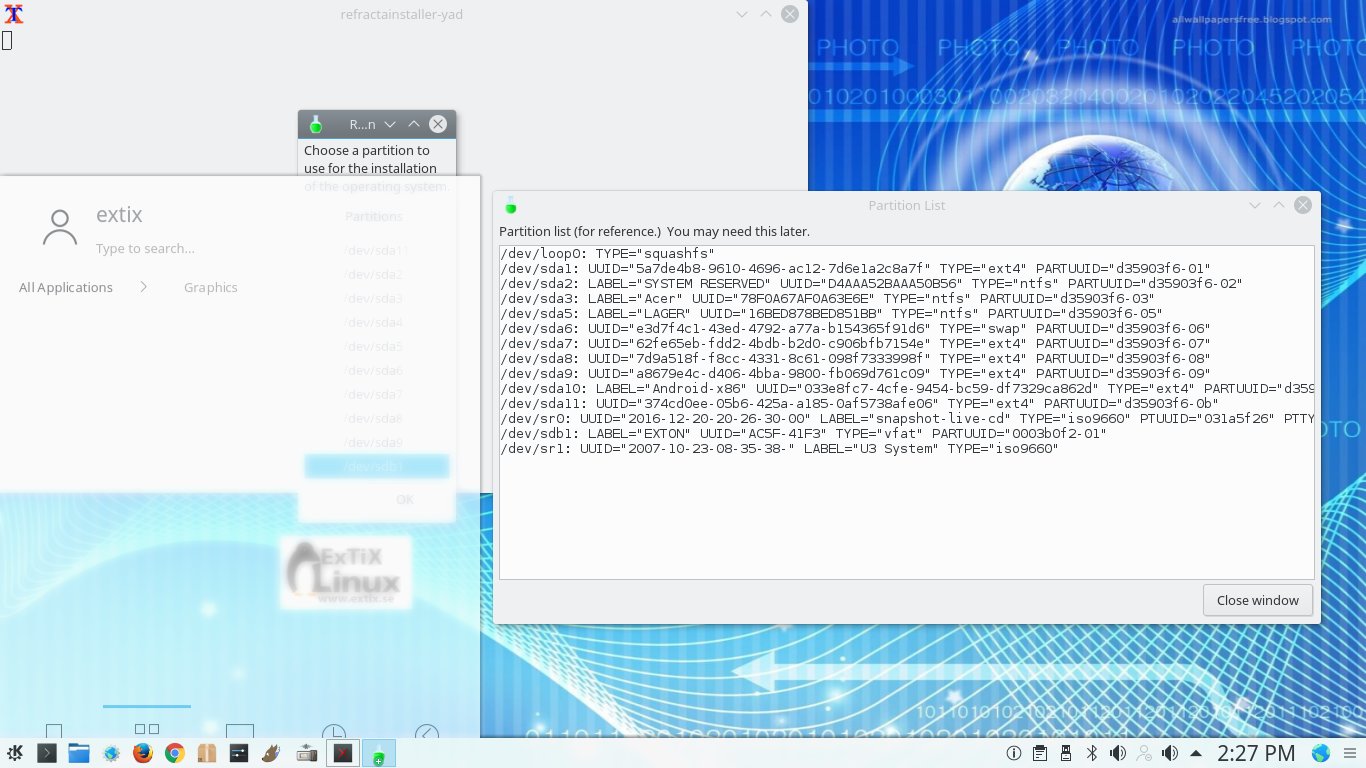
5. Screenshot 5 – Choose /dev/sdb (check it carefully so it’s the correct device. I.e. your USB stick)
6. Screenshot 6 – Choose to install ExTiX to /dev/sdb1 (check it carefully so it’s the right device. I.e. your USB stick)
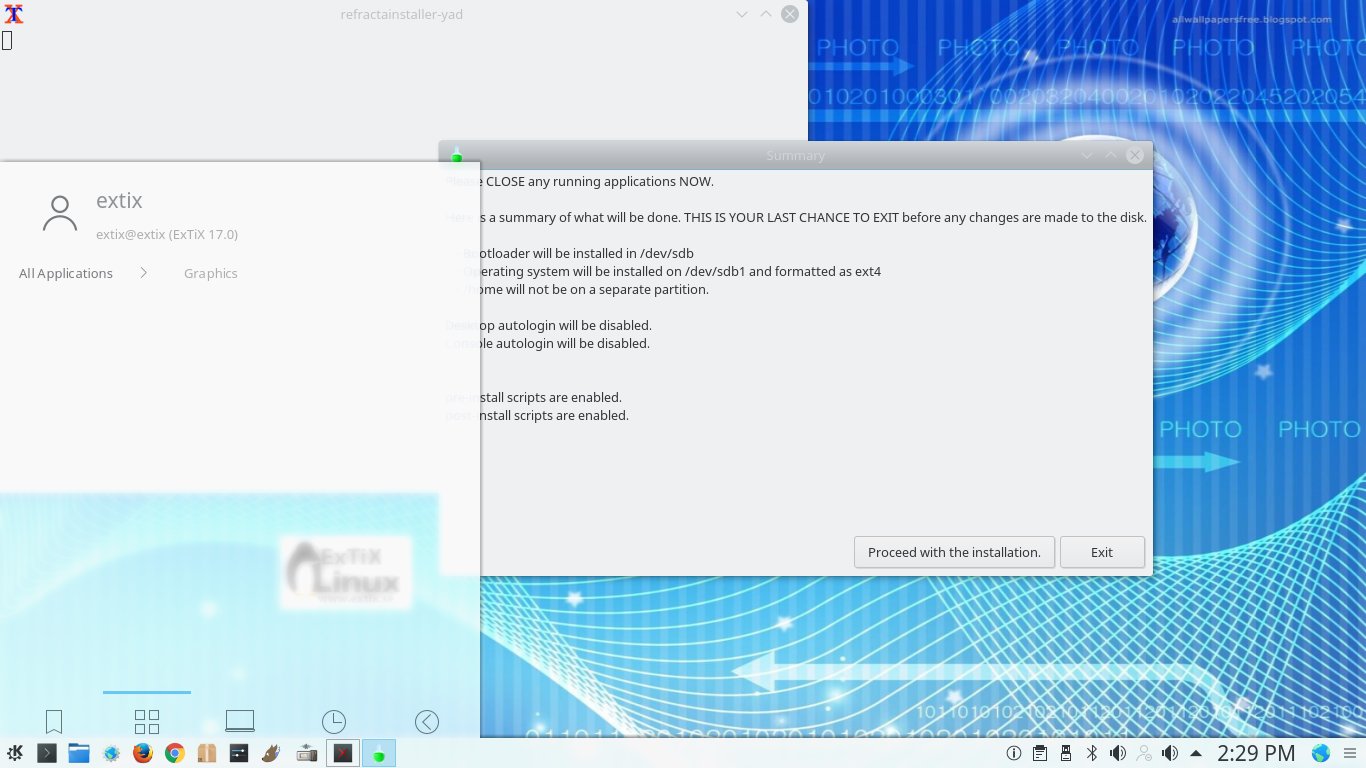
7. Screenshot 7 – Check carefully and then proceed with the installation
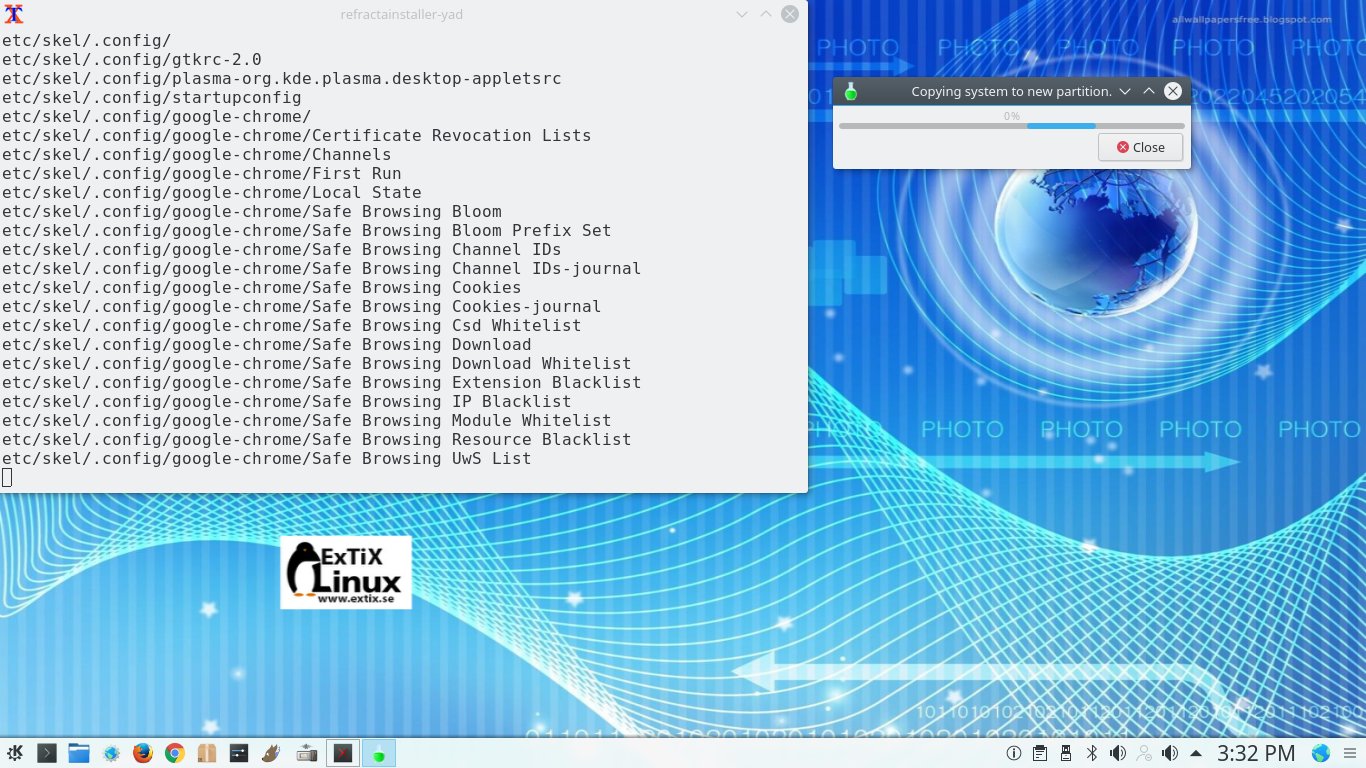
8. Screenshot 8 – The installation progress…
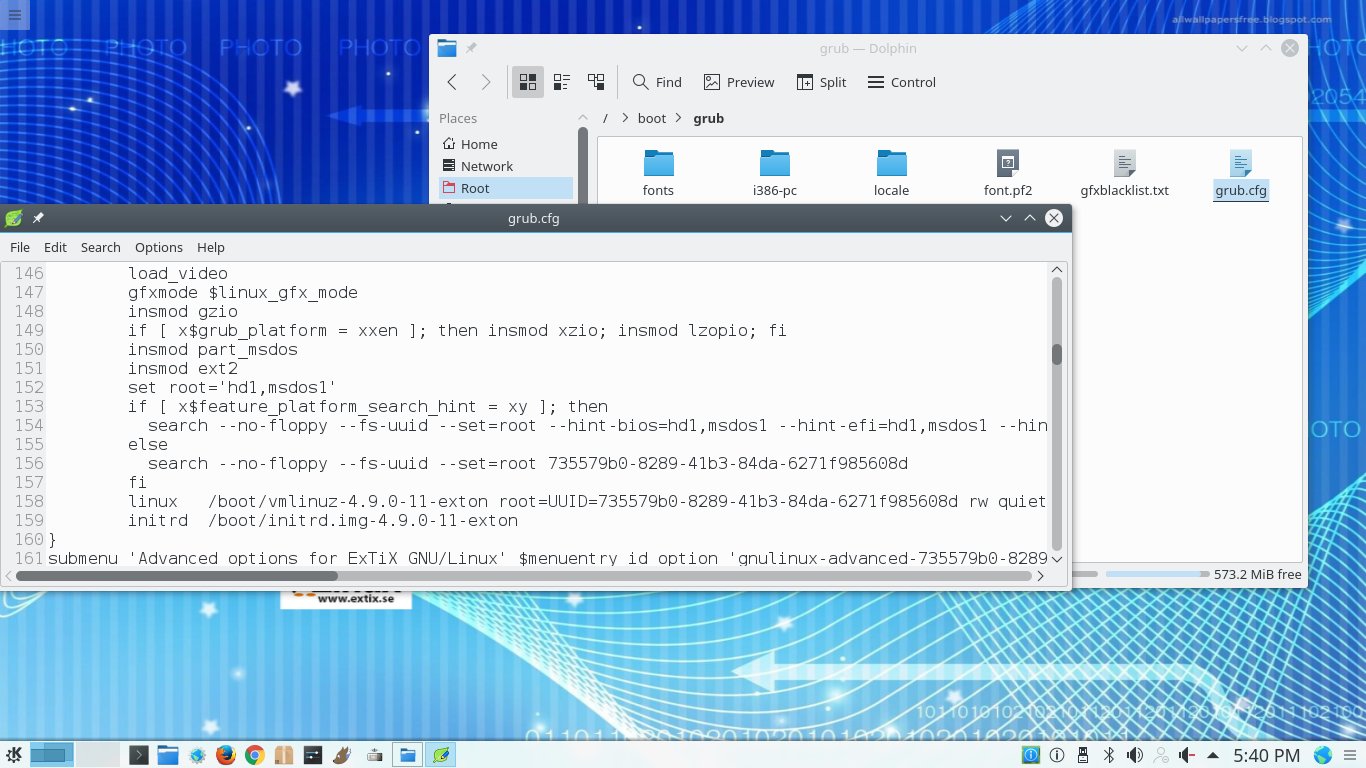
9. Screenshot 9 – Mount /dev/sdb1 and edit /boot/grub/grub.cfg. Change ro to rw on line 158.
After following the instructions 1 – 5 or 1 – 9:
Restart your computer with the USB stick in place and change the BIOS so that the computer in the first place is booting from the USB stick.
NOTE1: This way to transfer/install ExTiX to a USB stick works perfectly.
NOTE2: If the above described methods doesn’t work for you, you should try with another USB stick. (Another brand). All different versions of SanDisk are known to work very well. See also below.
Error messages when running from USB
Common error message when trying to run ExTiX from an USB stick: (initramfs) mount: mounting /dev/loop0 on //filesystem.squashfs failed: Invalid argument. Can not mount /dev/loop0 (/cdrom/casper/filesystem.squashfs) on //filesystem.squashfs
Solution: Try with another USB stick (another brand). NOTE: It appears that not all USB sticks are suitable for topical purposes. I.e. they can not be made bootable. I myself have experience of brands Kingston DataTraveler, SanDisk Ultra USB 3.0, SanDisk Extreme USB 3.0 and Sony Micro Vault. The first three works (for me). You shall not use USB sticks of older model. They may work, but mostly bad. If you – after the installation of ExTiX to the USB stick – get different error messages (see above) when you try to run the system from the stick it is often because the stick is not “good enough”.
Alternatives in Windows
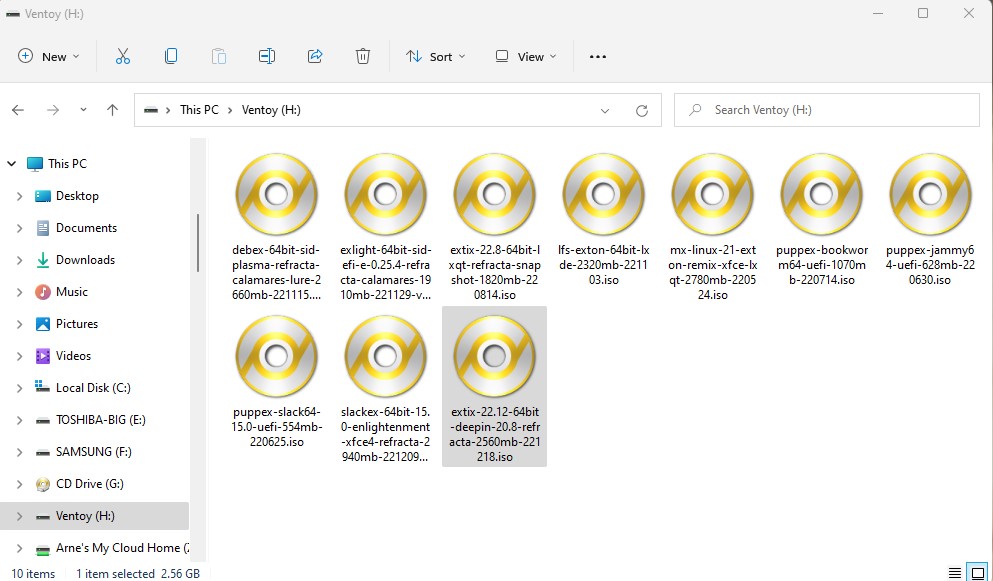
Use Rufus or Ventoy in Windows. The stick may not be made bootable if you use other apps. Watch the screenshot below when Ventoy is used. Note that you can have 10 (or more…) Linux systems on one USB stick. Persistence can’t be enabled though. Using Rufus you can actually create a persistence partition on the USB stick of about 2GB. It works, but unfortunately the system will be very slow when running from such a stick.
Important note
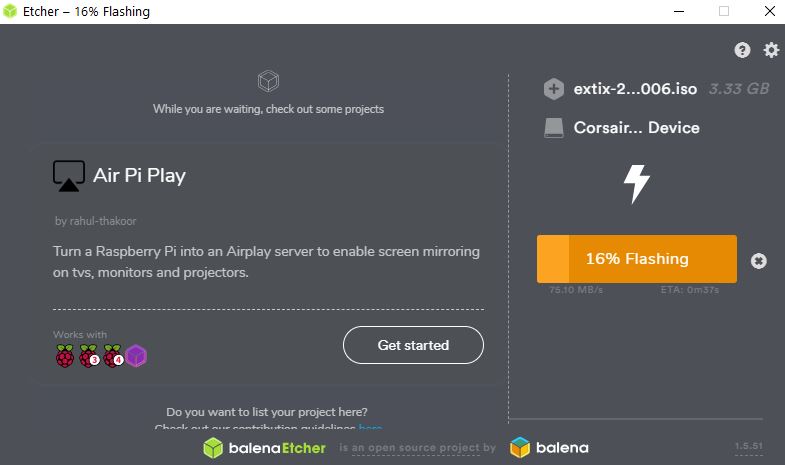
As regards ExTiX KDE/Anbox Build 220922 you must use Etcher instead of Rufus when installing in Windows. Using other USB flash apps won’t make the USB stick bootable. When using Etcher it will look like this.
BIOS settings
To be able to run your computer from the USB stick you’ll have to change the BIOS settings. For example from UEFI to Legacy boot. View this screenshot from one of my computers. As you can see I’m using SanDisk Cruzer Blade. Works very well (and you can buy it for about 6 $).
exton /240607
After I follow the directions B1-4, and then attempt to run B5 i get an error message: chmod: cannot access ‘mex-create-usb-drive-persistent.sh’: No such file or directory.
If you for example have downloaded mex-create-usb-drive-persistent.sh to /home/mint/Downloads you must cd to this folder before you run the chmod command.
When you run the rest of the commands you must be in folder where the scripts and the ISO file is.
You don’t say nothing about the user and password to run the live session. I think you must do it.
This is what I say on the main site extix.se:
LOG IN to LXQt repectively KDE
You can only run ExTiX live as root. Log in from Slim‘s Login Manager as root with password root in the LXQt version. Or as regards the KDE version; from console mode. Run startx to enter X/KDE. Press Ctrl Alt F1 if you don’t end up in console mode after the boot process. During a hard drive installation you will get the opportunity to create a normal user.
My laptop doesn’t have optical drive. You used to provide linux script for persistent install straight from image to pendrive?
Yes, but unfortunately the scripts doesn’t work anymore. Use UNetbootin. It works very well. Follow my instructions.
A small contribution. Got it working on a 32GB usb stick. Got rid of the error message…. “Can not mount /dev/loop0 (/cdrom/casper/filesystem.squashfs) on “//filesystem.squashfs”. Did format the usb drive with …. dd if=/dev/zero of=/dev/sdx bs=1M ….. you have to wait for about half an hour. Then fresh install.
——
“You can also use UNetbootin in Windows or Linux. See a picture how it looks before the installation starts in Windows 10. NOTE: You must replace syslinux.cfg in the root of the stick with this file. Change the file extension from .txt to .cfg before or after you have replaced the original syslinux.cfg. (Also so you can enjoy persistence and run ExTiX in RAM).”
————
Then delete casper-rw from the root of the usb and format ext4 partition with gparted and label it casper-rw. After install I did install my Icelandic language in synaptic and did dpkg-reconfigure locale and did choose is_IS.UTF-8 to get the right locale.
—
Wanted to experiment with some other variant of Linux on a usb stick.
Thanks for trying ExTiX and for sharing your experiences re. USB installations.
Burned this out on a usb. Started machine with USB. It started and everything seemed to work as it should. Well, no access to the various solutions from NVIDIA, whatever choice you chose during startup.
When it landed on kde-desktop, I looked for internet button so I got connected to the internet. but as a disappointment, I saw that there was no such button / choice. But I thought maybe you had put this into a finished installation! So I decided to install it. Used sudo and simple installation.
So far so good. Had to take it all one more time, then the desktop locked up and it was not possible to get locked up again. So I was careful to have mouse moving during installation. But then came the problem. It eventually came up a box that told me about a error during installation of the bootloader grub, but that it might go anyhow!
But it did not and I had to just say pass.
” To connect wireless you’ll have to start the NetworkManager applet ”
No, no such icon with this live-iso.
Am use Rufus in Win10 to make a usb.
Hi Exton.
Quote :
C) ExTiX KDE 17.0 Build 161221 can also be installed to a USB stick using the regular installation program. In this case Refracta Installer
————
Is this method ‘Normal” installation without persistence’ or ‘Installation with persistence’ ?
You will (of course) get persistence. Your USB stick will be like your hard drive.